How to do the Tuck Crunch
CoreAbsBodyweightIntermediate
The tuck crunch strips the ab curl down to its most mechanically honest form, forcing your rectus abdominis to work through a full shortened position without hip flexors stealing the load. Master this movement and you build the kind of deep abdominal control that carries over to every compound lift you do.
Add this to my personalized plan →Muscles worked
Primary
AbdominalsObliques
Secondary
Hip flexorsLower back
Step-by-step
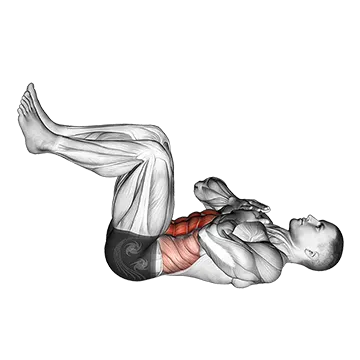
- Lie flat on your back, bring your knees to a 90-degree tuck position with feet off the floor and hands lightly behind your head.
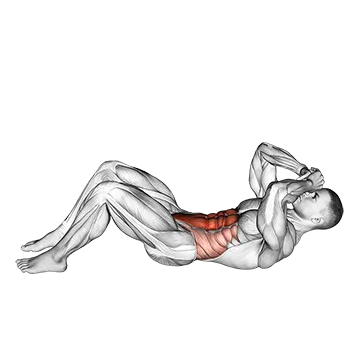
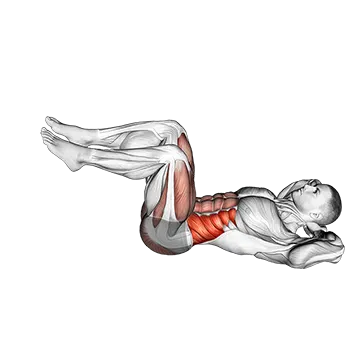
- Exhale fully and curl your shoulders off the mat while simultaneously drawing your knees toward your chest, compressing the torso.
- Hold the peak contraction for a full count, feeling the abs shorten completely before any movement reverses.
- Lower shoulders and extend knees back to the start position under control, resisting gravity rather than dropping.
Common mistakes
- Pulling the neck with your hands — keep elbows wide and let the abs initiate the curl, not your arms.
- Using momentum to swing the knees in — pause at the bottom and restart each rep so the abs do the actual work.
- Shallow breathing that locks the core before the crunch — exhale hard through the movement to allow maximum spinal flexion and full muscle contraction.
Pro tip — Think about pulling your sternum toward your pelvis rather than lifting your shoulders off the floor — this subtle mental shift eliminates hip flexor dominance and routes every ounce of effort directly into the abs.
Sets & reps by goal
Build muscle3–4 sets × 10–15 reps
Get stronger3–4 sets × 6–8 reps
Lose fat / tone3 sets × 12–20 reps
Rest: 60–90 sec between sets.
More Core exercises
Want this built into a full plan?2fit4u turns moves like this into your personalized weekly program — free to start.
Build my free plan →